|
|
|||||||||||||
|
|
||||||||||||||
|
||||||||||||||||||||||||
|
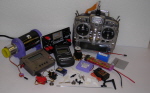
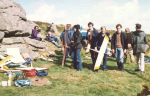
Repairing Foam Wings | Back to Article Index Radio Control Model World - Feb '96 by Stan Yeo INTRODUCTION One evening late in May I had a minor disaster. I encouraged my brother to fly one of my slopers in less than ideal light conditions. We were flying on a North West facing slope, late in the evening, with the sun in our eyes. There was also a generous sprinkling of dark clouds to add to the confusion. Consequently it was not long before there was a problem and by the time I was given the transmitter the model was low in the sky and a long way out from the slope. Admittedly it was in a level attitude and pointing away from the hill but sinking below the horizon fast. Once the model did go below the horizon it disappeared into a black hole. Needless to say I lost control. Part of the problem was the ski goggles I was wearing. They had orange lenses, and whilst blocking out the worst of the sun, they tended to accentuate the remaining rays and give anything below the horizon a dark brown hue. This made it almost impossible to see the model once it had slipped below the horizon. The moral of this story is choose your eye protection carefully. This prompted a comparison of eye protection worn by club memebers. These tests, though limited, suggested that grey lense ski goggles were better at blocking out sunlight and not producing secondary rays than orange lenses. They were also better when flying below the horizon. The outcome of all this is that the model ended up embedded in a solitary bush in the middle of some very soggy ground! A branch had managed to penetrate the port wing to within an inch or so of the rear spar. Now, under normal circumstances, I would have built a new wing but time being what it is I decided to repair it. This involved removing the damaged area and grafting in a new section of wing. The repair went so well that I thought I would share the technique used with you as this type of accident must happen to thousands of modellers every year and it is not always possible to get replacement wings. Step 1 First remove the covering down to the veneer. Cut out the damaged area to a regular shape ensuring that the cut is square to the wing surface. Keep the cut-out shape simple as you have to cut a foam insert to exactly to the same shape. Step 2 Cut a block of foam from the same material as the original core to match the cut-out in Step 1. When satisfied that you have a good fit double side sticky tape the block in position ensuring that the tape does not extend beyond the wing surface into the cutting area. Step 3 Take your trusty foam cutting bow or borrow one from a friend, and insert two pieces of spruce strip that are an inch or so longer than the depth of the bow about 4ins (100mm) either side of the centre line (see diagram). The purpose of this is raise the ends of the bow above the surface of the wing so they do not interfere with the cutting operation thus allowing the cutting wire to follow the contour of the wing. For those that do not have access to a foam cutting bow they are easy to make. I use a piece of wooden batten with two pieces of 6swg (5mm) piano wire of the appropriate length inserted in the ends at a slight outwards angle to allow for the tension of the cutting wire. The cutting wire I use is 24swg Nichrome locking wire as used to wire-lock electrical plugs on full-size aircraft. This wire requires a current of 2 - 2.5 amps to attain the temperature required to cut low density white foam. The voltage needed will be dependant on the length of the bow. A 12v battery could be used but you will have to experiment to find the correct length of wire to get the right temperature. Step 4 Support the wing in a comfortable position to operate the bow. Check the wing for alignment (twist / bow) and switch the bow on. Starting at the trailing edge, slide the bow over the wing towards the leading edge, cutting the new core insert as you go. Let the wire do the work and exit both ends of the block at the same time. Do not try to rush the bow otherwise you could dislodge the foam block causing a minor disaster. Step 5 Remove the foam block from the wing and reposition with the surface you have just cut approximately 1.5 - 2 thicknesses of veneer below the wing outer surface. This is to allow for the two thicknesses of veneer that are to be glued to the repair insert. Cut the other surface of the repair as before and remove core insert. Step 6 Veneer the insert as per the original. Copydex or its Unibond equivalent is the contact adhesive normally used on white foam. Epoxy the veneer insert in position and carefully trim the foam core insert to accept a new section of leading edge. Fit the new section of leading edge and glasspaper to shape. Step 7 Apply two layers of lightweight fibreglass tissue over repair joint top and bottom to return wing to pre-repair strength. The top layer of tissue should be narrower than the bottom to make it easier to blend in the repair with the existing structure. Using Wet and Dry abrasive paper blend repair into wing and restore surface finish. My repair took approximately 4 hours, considerably less than it would have taken to build a new wing and cost only a few pence!
|
|